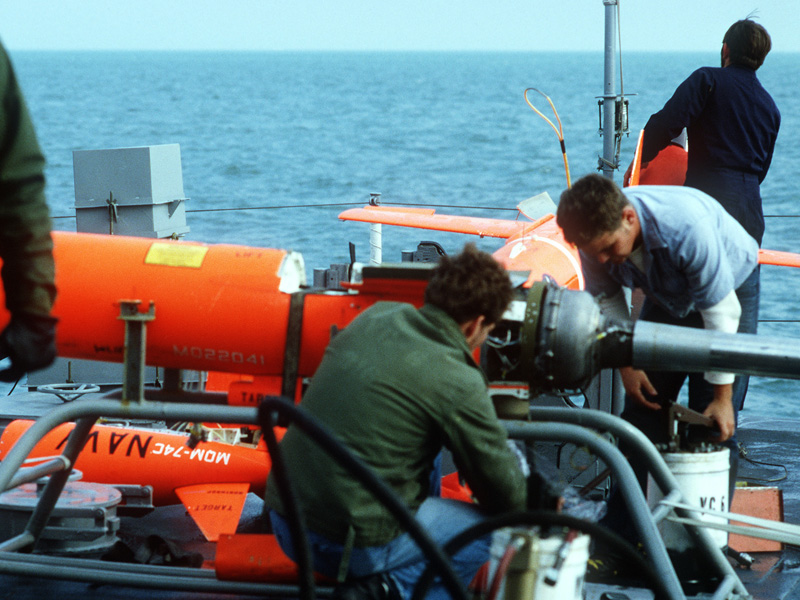
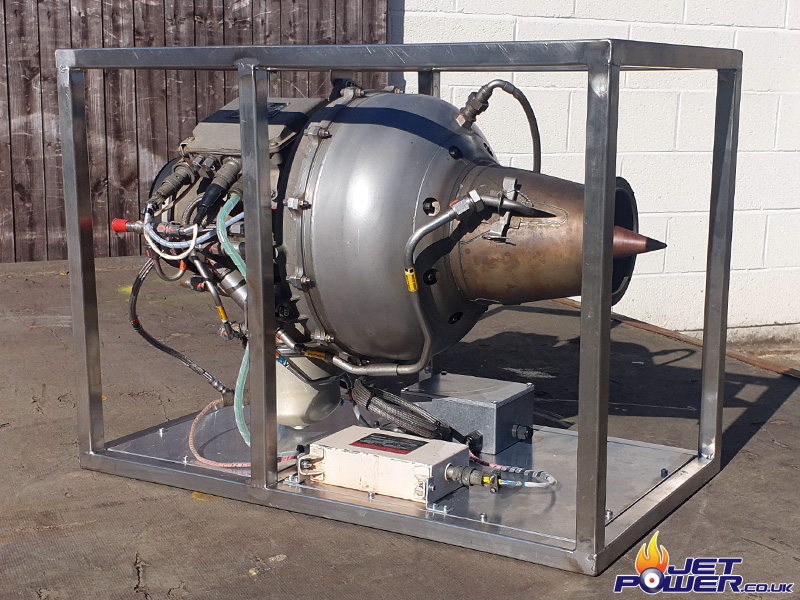
From a Northrop BQM-74 Chukar Target Drone
The Chukar Drone has a rocket assisted launch, is radio controlled and ditches in the sea once the mission is completed.
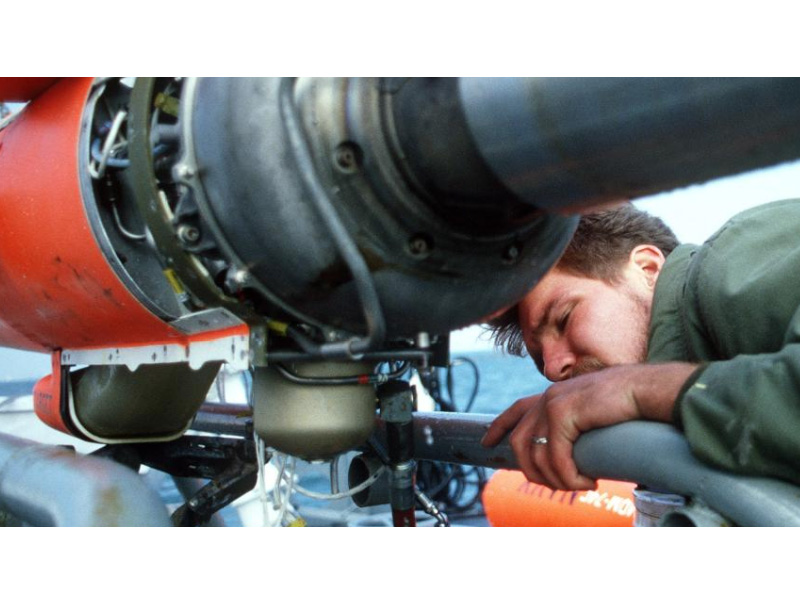
The tail section is removed to allow a pre flight inspection of the Williams WR24-7 before flight.
Presumably checking oil lubrication levels, important as the engine runs a full loss system.
Rocket assisted launch.
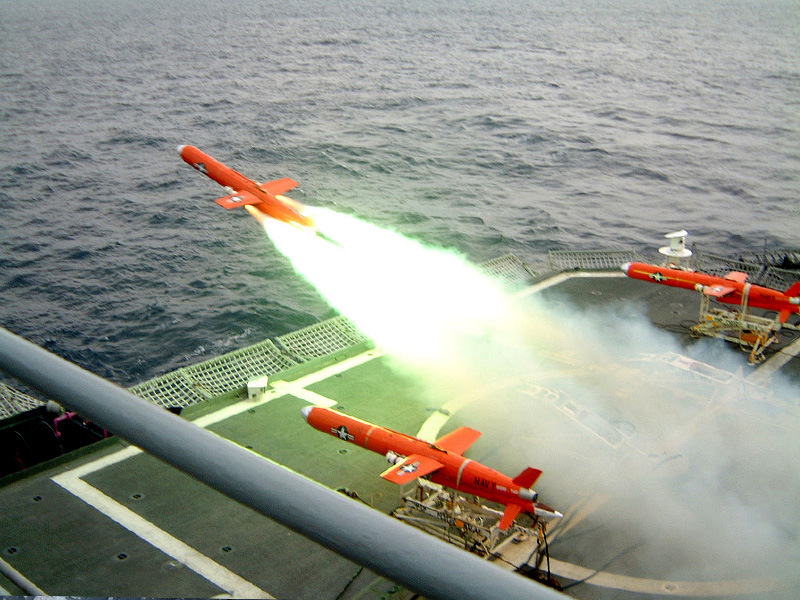
And water recovery.

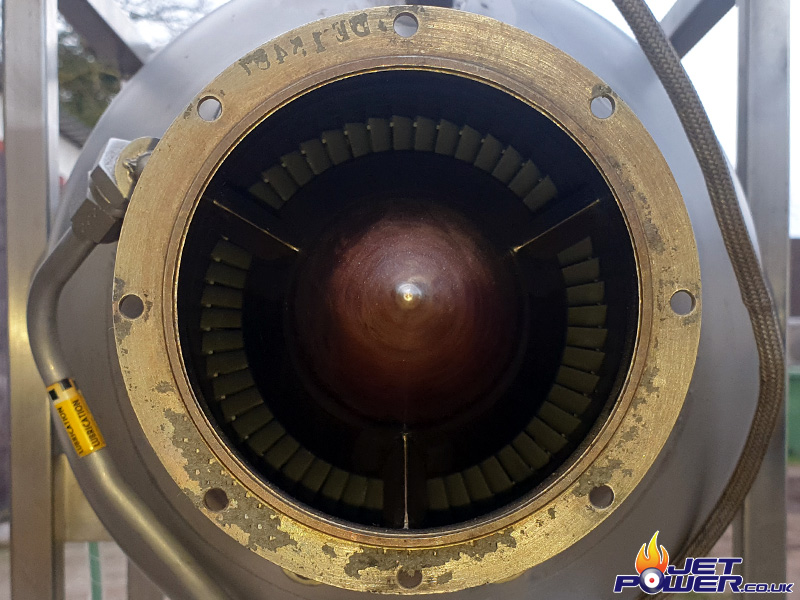
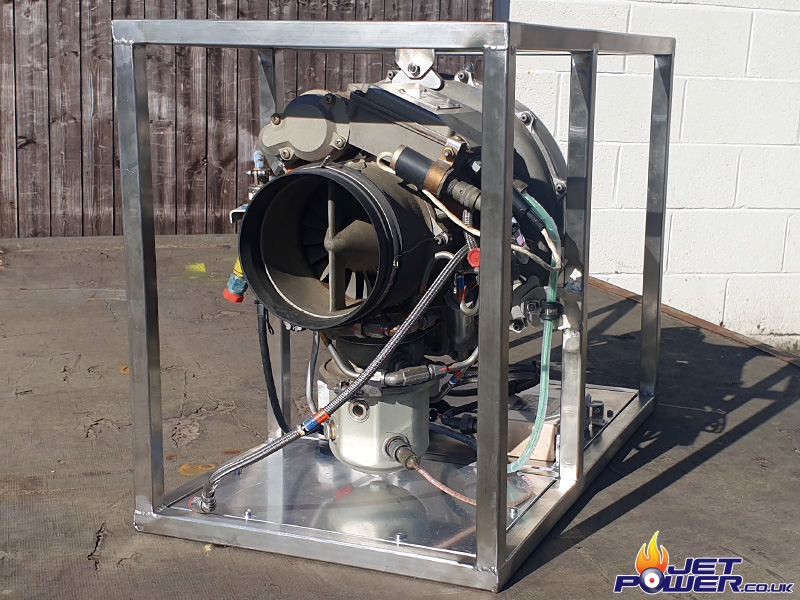
First Stage Compressor.

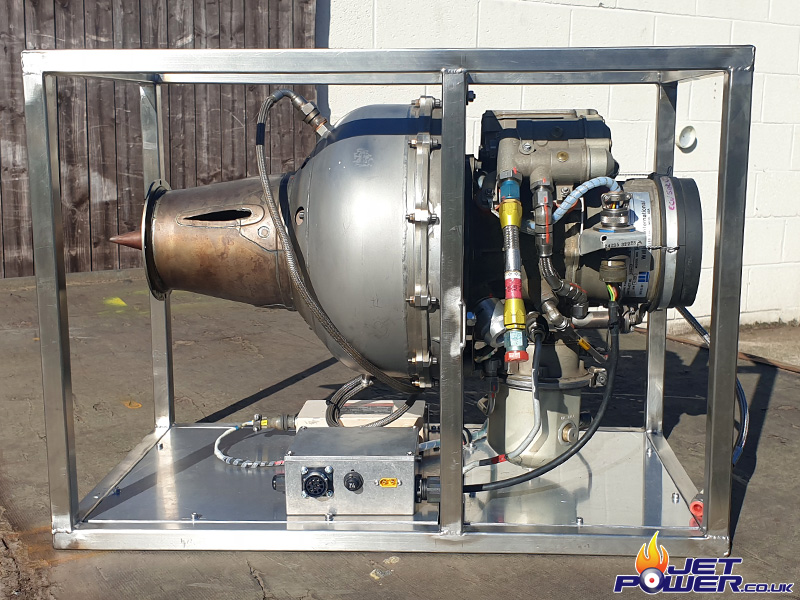
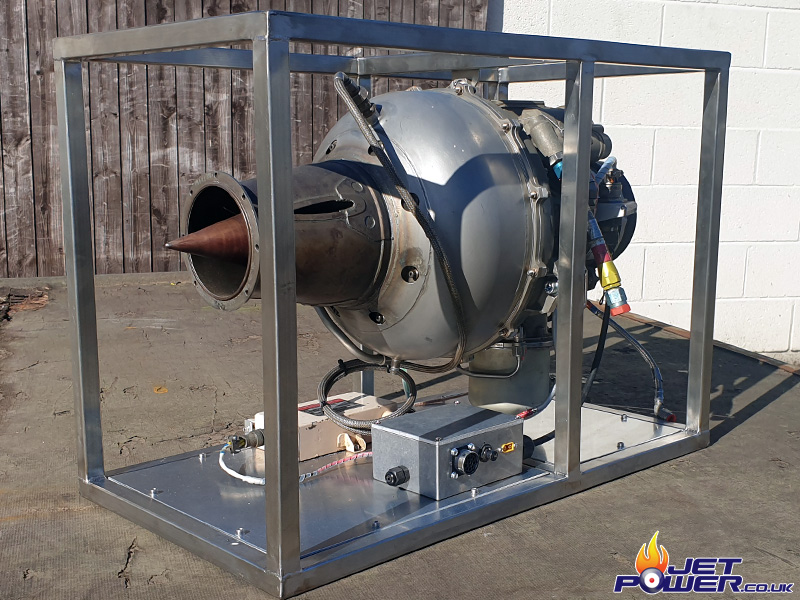
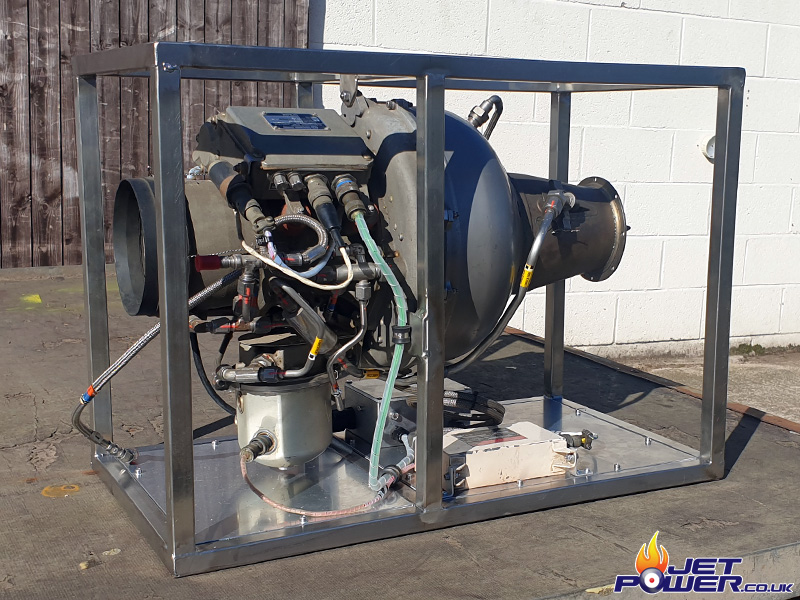
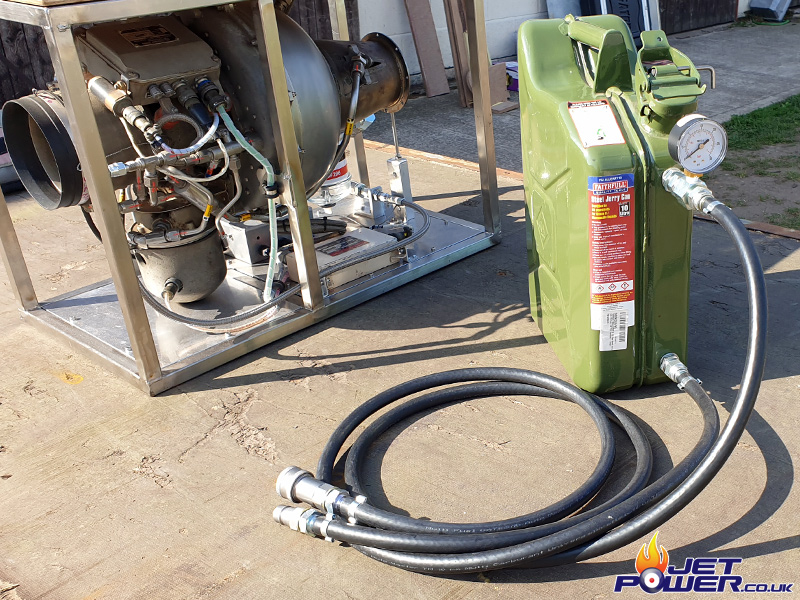
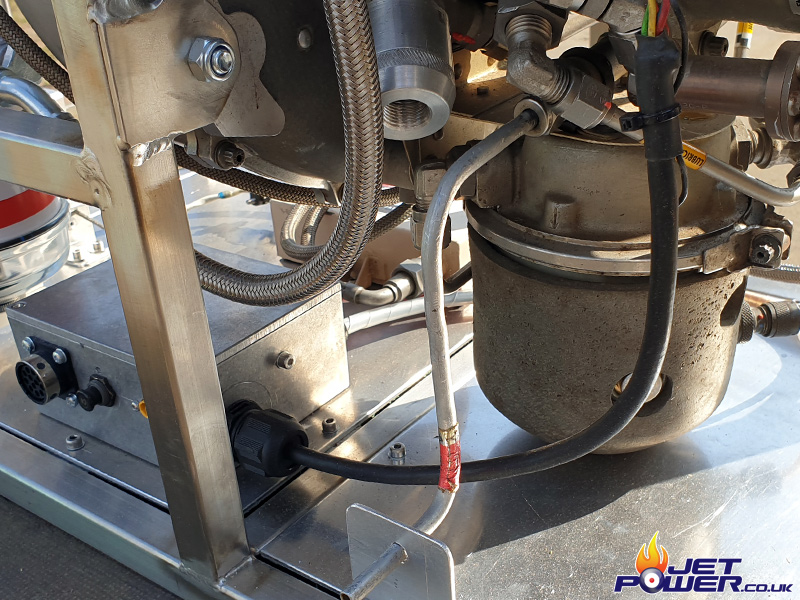
20mm Stainless Steel frame fabricated, saves having to worry about scratched paint.
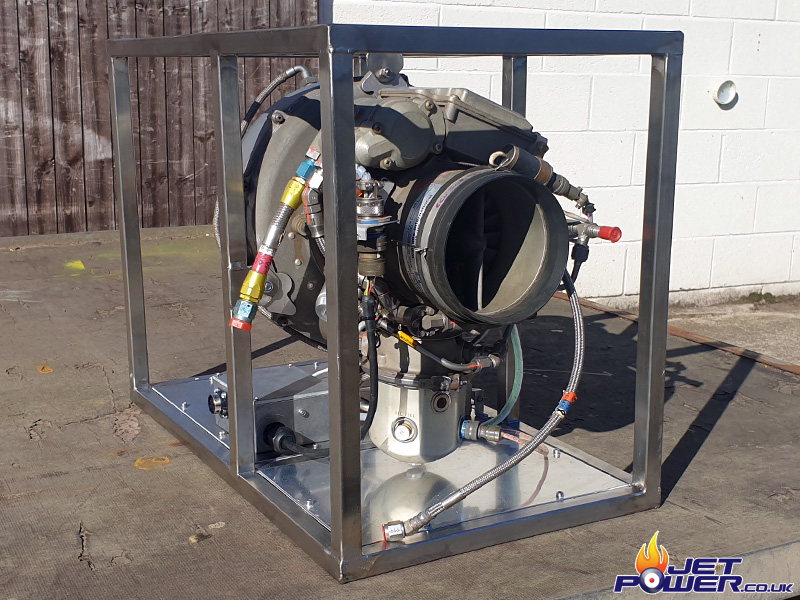
The engines ECU is mounted on top of the compressor inlet section.

Beautifully manufactured Turbine stage.
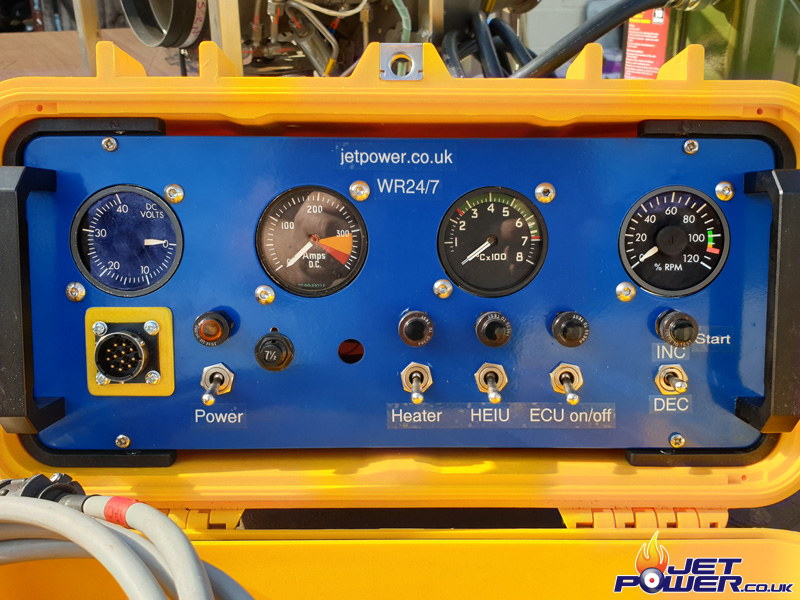
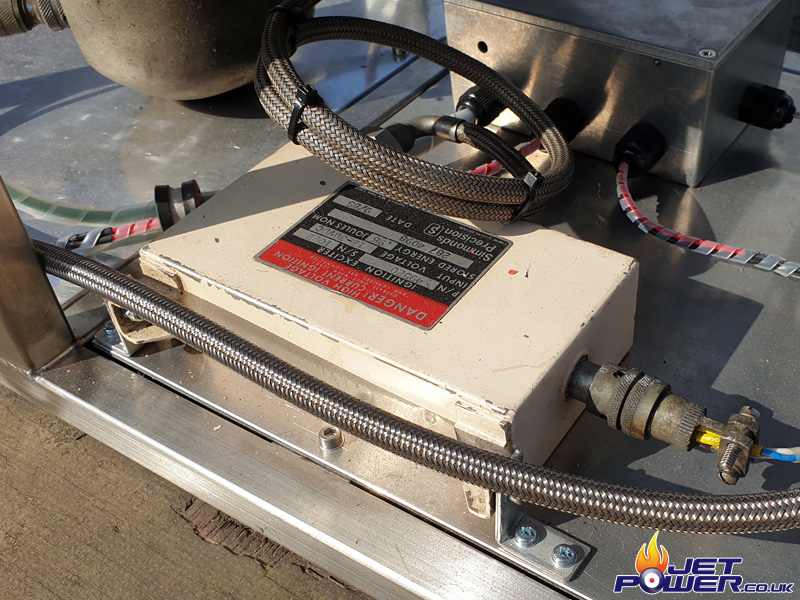
Control Panel Wiring, which includes Ammeter Tuning, RPM Voltage divider circuit and RPM driver board.
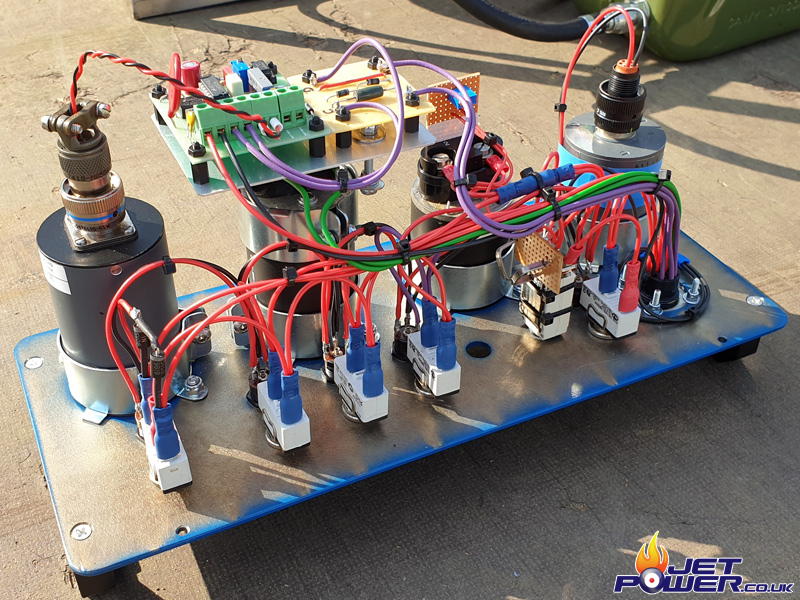
The ammeter has been calibrated so that 300 amps displayed is actually 30 amps.
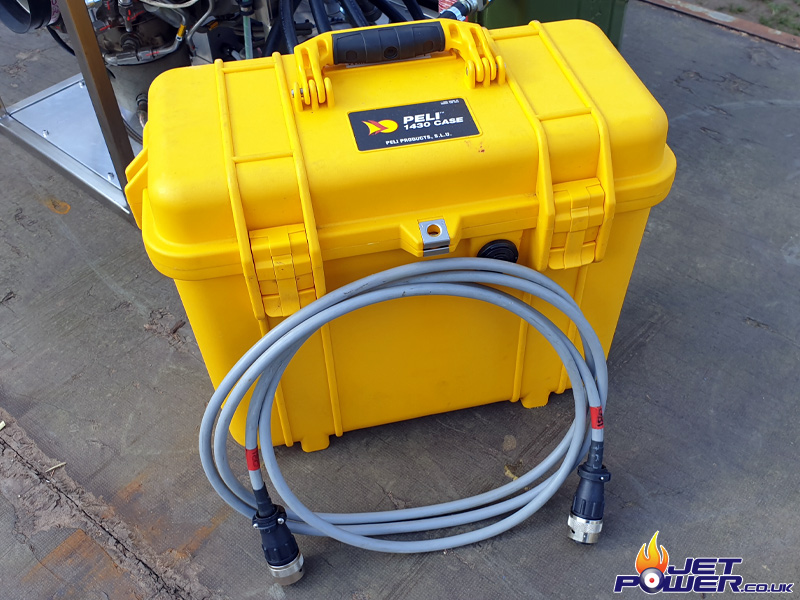
All packed nicely in to a Peli 1430 Case.
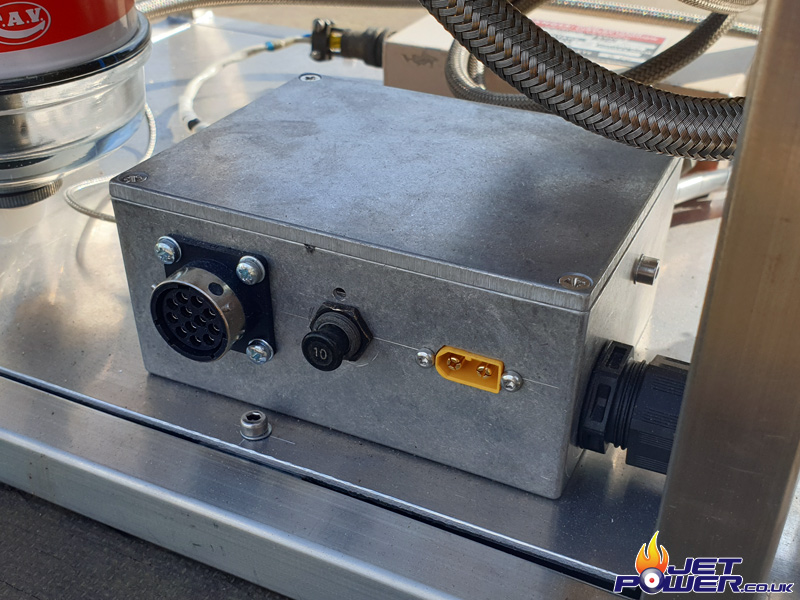
Break out interface box houses the connector to the control panel, a 10 amp circuit breaker and a 28 volt DC supply connector.
I have started making frames that can accommodate lids as it allows smaller engines to be stacked on top of each other saving storage space.
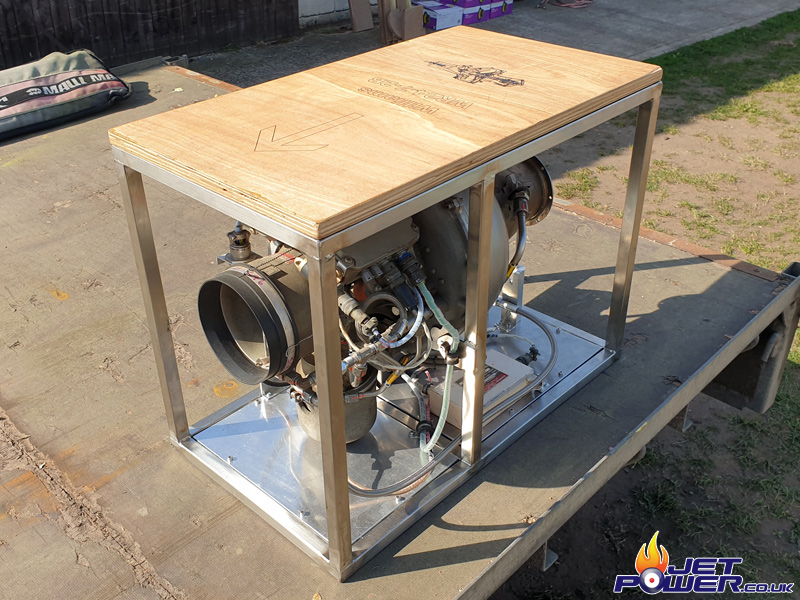
I have also made use of my Laser Engraver, really I suppose because I can.

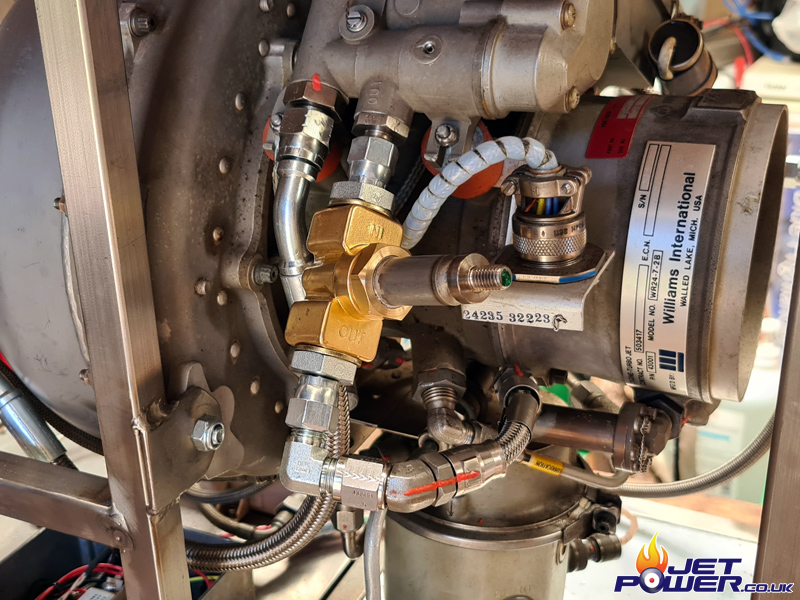
Fuel Tank. The lower pipe feeds the fuel, the top pipe receives P2 compressed air from the engine. As the tank is not designed to be pressurised the gauge will help me keep an eye out for potential tank failure situations.
HEIU from a Tornado APU is used for ignition.
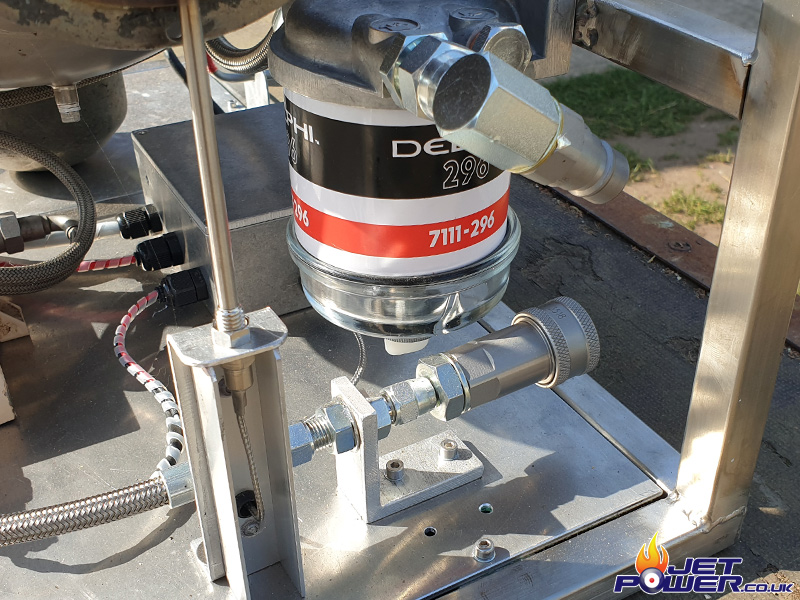
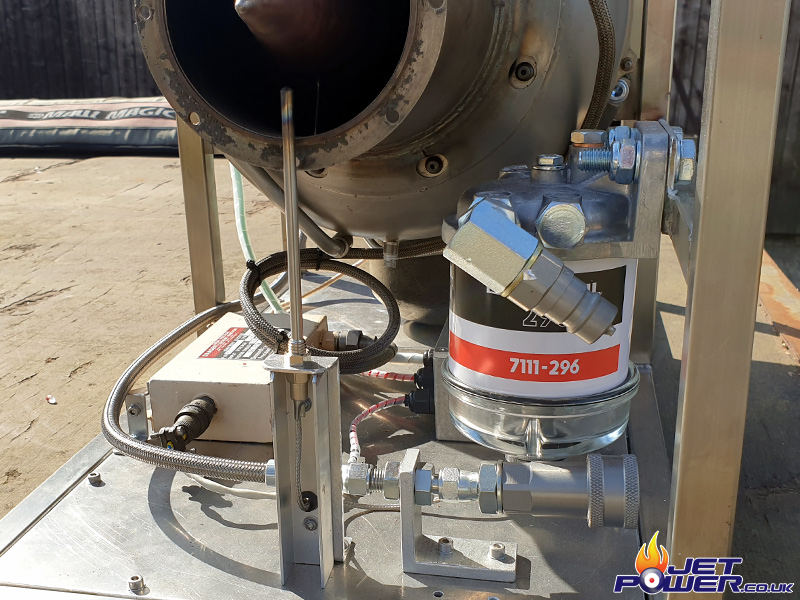
This might be a bit of a sketchy decision for fuel filtering, in fact I’m pretty sure it won’t take much pressure before it leaks, I had one in the workshop, so before I buy something else it’s going to get a try.
Compressed air outlet using a F/M Q/R fitting and fuel inlet via the male Q/R fitting.
Fuel drain mounted overboard of the frame.
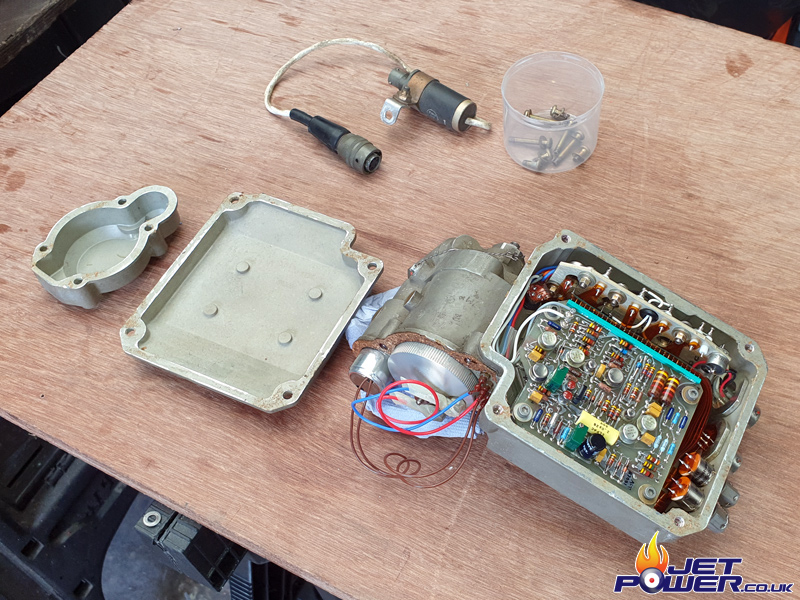
I tried to to run the engine and it wouldn’t start, so I connected a signal generator on to the ECU to simulate engine RPM and when at 10% RPM and starting sequence initiated, I should hear the fuel valve activate. Nothing….. So I removed the ECU and did a partial strip down, the electronics look good with no sign of corrosion.
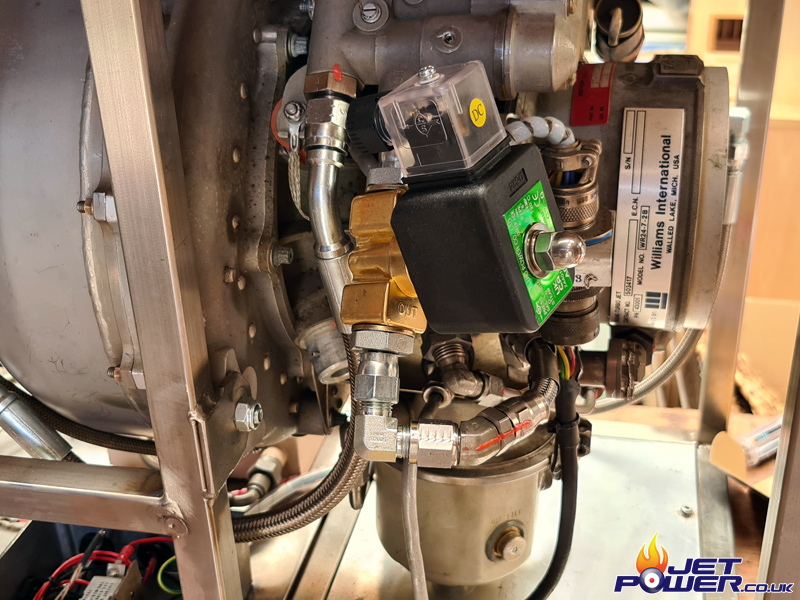
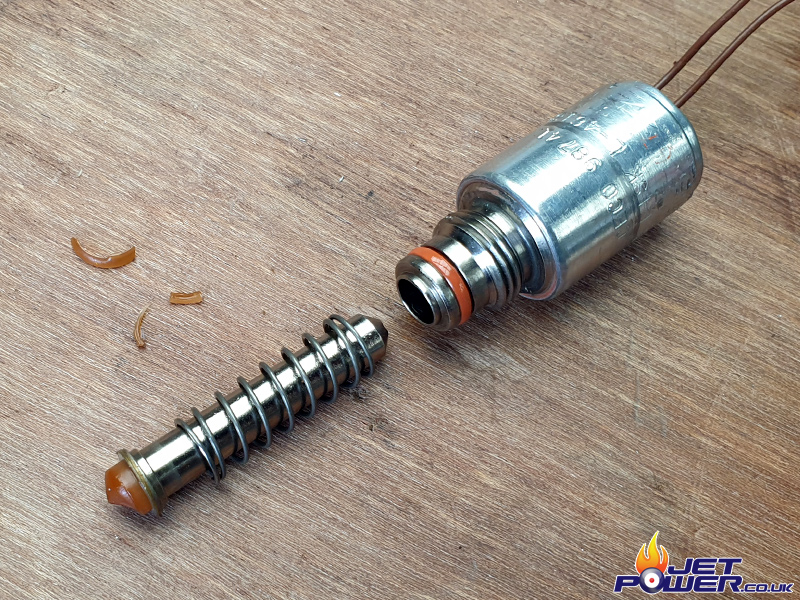
Fuel shutoff valve on the left, proportional fuel control valve on the right.
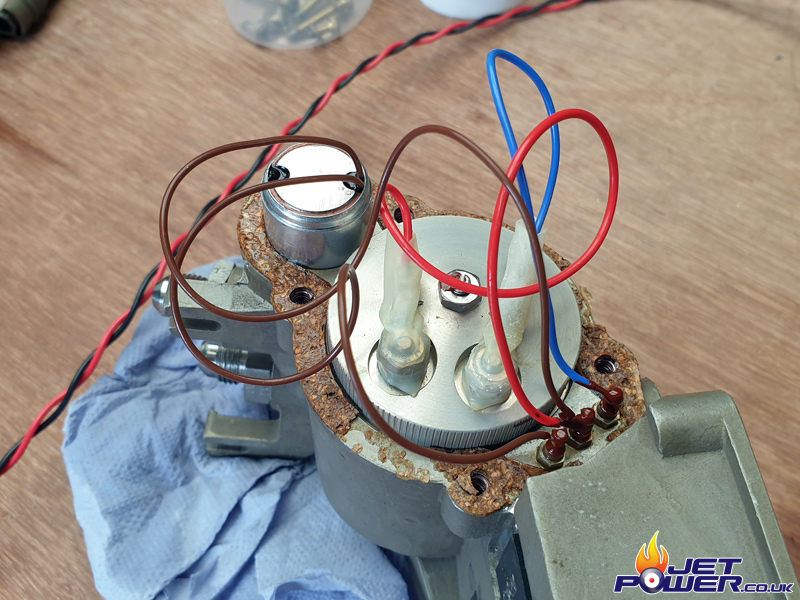
Just noticed some debris inside the fuel valve port, hopefully this is what is stopping the valve from working, so feeling optimistic removing it will sort the problem.
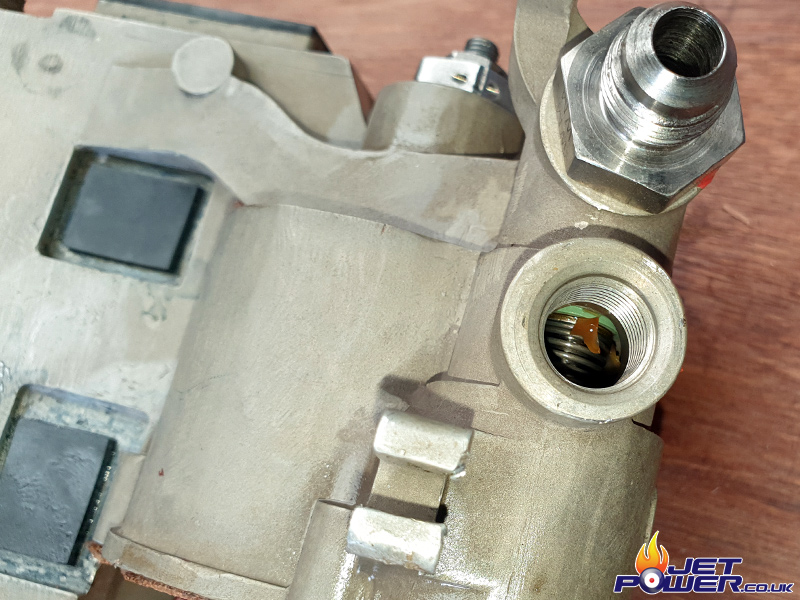
I removed the fuel valve and it was instantly apparent that the debris was a degraded seal, which is a pain. I electronically removed the valve and applied 24v to the coil and it activated just fine, so whats worse than the seal is that the ECU must have a fault as it doesn’t actuate the valve at all. My choices are now to attempt to repair. find a replacement or try to make one from scratch using an Arduino or similar.
First run of the WR24-7 with the HP Cock bypassing the ECU and controlled separately. It might not seem like it on the video, but quite a scary experience when you are close up and personal with it.
In a nutshell, this configuration worked OK, although tweaks are needed.
One noticeable thing is that when the engine is shut down, the fuel tank remains pressurised and as the seal in the built in HP Valve is not the greatest, fuel is still making its way in to the hot engine and creating a ton of fuel vapor. Not the best really, but this can be stopped by releasing the pressure in the tank.
My solution is to add a separate external valve in to the fuel line and bypass the built in valve by removing the valve plunger altogether.
I made use of a permanently rated 24 VDC energising coil with a fuel resistant seal in the valve block.